Hey there, marketing masters! Are you about to start your new marketing campaign? Let us help you spice it up and ramp up your returns.
Having animated videos is now your lucky charm. Not just glamorous, but a compelling, informative, and engaging idea to grab the attention of the audiences – that’s what these magic makers are.
Now, I know what you’re thinking: “Creating animated videos sounds hard!” And guess what, you got it right.
This guide on how to make stunning animated videos with AI will take you through everything – from choosing the most interesting AI tools to adding pump-up music and awesome sounds.
In the end, you will be handling your great ideas to create enthralling animated films of your choice that can enhance marketing outcomes significantly.
Are you willing to go further and let the animated power out? Let’s do this!
Step 1: Choose the Right AI Tool
Animation in videos made utilizing artificial intelligence can be revolutionary for content makers, marketers, teachers, or anyone running a business.
But, the process begins with choosing the right AI tool. Thus, it is crucial to select a tool that suits you and your requirements among numerous available tools.
Here is a list to assist you in making a decision easily.
Understand Your Needs:
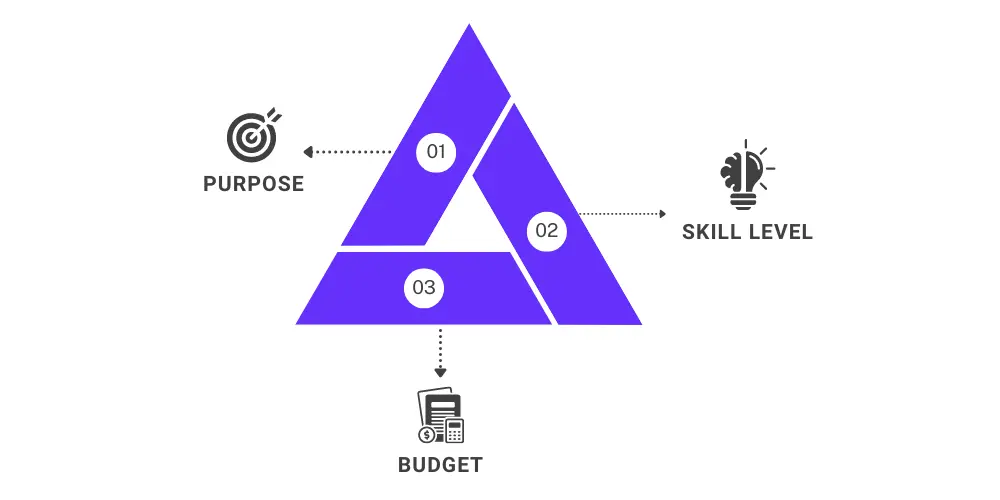
Before diving into the specific tools, it’s crucial to understand your requirements:
- Purpose: What type of content do you need? Explainer videos, marketing videos, educational or training videos, social media posts?
- Skill Level: Do you consider yourself as an entry level, mid level, or power user?
- Budget: Do you want free tools, or are you ready to subscribe for the additional functions?
Popular AI Tools for Animated Videos
Here are some of the most popular AI tools for creating animated videos:
1. Animaker
- Overview: Animaker is famous for a simple interface and offering more templates than in any other similar services. It is suitable to be used for any person- be it, a beginner or even a professional.
- Features: Character animations, voiceover, and effects with a great number of templates and other materials available.
- Pros: Huge collection of assets, the software is very user-friendly and the price for plans offers great value.
- Cons: A few more complex functions of the application are only available in pro-versions of the software.
2. Renderforest
- Overview: Renderforest has features in video maker, animations maker, logo maker, and mockups maker. Primarily, it is ideal for individuals who wish to come up with very fine videos within the shortest time possible.
- Features: Consists of; animation themes, music videos, and show openers and closings.
- Pros: Shareware, full-color, paper-quality document printing, easy to navigate.
- Cons: The idea of customization is somewhat restricted in the free version of the game.
3. Veed.io
- Overview: Veed.io is an interface-based online video editor that has powerful features, therefore, best suited for simple and raw editing and social media content.
- Features: Contains features of adding subtitles, captions and animation.
- Pros: Simplicity, good for quick change, great for social media platforms.
- Cons: Unfortunately, the advanced features, which are developed as additions, may be rather expensive.
4. Synthesia
- Overview: Synthesia deals with creating AI videos with cast looks like real human beings. The programme is perfect for one intending to produce professional quality videos with life-like characters who can even talk in different languages.
- Features: Allows working in multiple languages, avatars customization, and script-based video creation.
- Pros: Real life like avatars, availability of multiple language support, extremely good quality work.
- Cons: Designed for professionals and large corporations the price is higher.
Evaluating AI Tools
When selecting an AI tool, consider the following factors:

- Templates and Assets: Make certain that the tool contains enough resources that include; templates and media to suit the required needs.
- Customization: This is to ensure that one has taken his/her time and looked at the level of customization allowed for animations, text, and even graphics.
- Output Quality: Check the quality of the video such as the resolution of the video and overall appearances.
- Pricing: If there are multiple pricing plans then the next step will be to compare them and select the one that you can afford. Seemingly, many tools available for use come with free trials, or even have a free version of some sort.
- User Reviews: These are important so that one can see what others are saying about the tool and its usefulness.
Step 2: Sign Up and Log In
- Visit Website: To get to the tool, first, it is necessary to go to the official website of the AI tool.
- Sign Up: Go up to the blue highlighted typography that says “Sign Up” in large letters.
- Enter Details: Please enter your first name, last name, email address and a special security code.
- Confirm Email: Goto your inbox for the confirmation link Click here.
- Log In: Go back to the website, click ‘Log In’ and then input your email and password.
Step 3: Select a Template
Once you’ve signed up and logged in, it’s time to dive into the fun part: This is going to happen when choosing a template.
Selecting the right template is like selecting the right clothes for your video—introduces the mood, theme, and type of structure which makes the process of creation much easier and faster.
Browse Templates: Explore the Library
Most AI video tools come with an extensive library of templates designed for various purposes.
- Access the Template Library: Navigate to the template section on your platform. This is usually prominently featured in the dashboard.
- Search by Category: Templates are often categorized by theme or purpose, such as business, education, social media, and more. Use these categories to narrow down your search.
- Preview Templates: Click on the templates that catch your eye to preview them. This gives you a feel for the animations, transitions, and overall style.
Example: Suppose that you are working on a specific project, for instance, campaigning for a new product through a video. You may search the site for templates in the “Marketing” or the “Product Launch” folder. Test a few perusing styles to find which one corresponds to your lay of the land.
Customization: Take it or make it
Once a template is chosen, it is possible to adjust the page according to the needs of a particular brand or personality. Prepared patterns are ideal, but personalization of the material is what makes the video distinctive for everybody.
- Edit Text and Images:
- Adjust Colors and Fonts
- Add Your Logo.
- Modify Animations
Example: If your brand colors are blue and white, update the template to reflect these colors. Replace the default text with your product’s key features and benefits. Add your logo to the intro and outro sections.
Using templates offers several advantages:
- Time-Saving: Significantly reducing the time needed to create a video from scratch.
- Professional Quality: Templates ensure your video looks polished and high-quality.
- Ease of Use: Making it accessible even for those with little to no video editing experience.
- Consistency: Using templates helps maintain a consistent style across multiple videos.
Step 4: Add Your Script
Now that you've chosen your template, it's time to add the heart and soul of your video.
Before you proceed to creating your video, there is a need for feeding an input script to help the AI in the process.

This is how the script should remain straightforward and interesting for the viewer, and how it can be input into your AI video creator.
Write Your Script: Keep It Concise and Engaging
It has to be simple and pointed and correspond to the pictorial material that is going to be used. Here are some tips:
- Start with a Strong Opening: Start out as early as possible to start engaging the attendees and grab their attention
- Stay Focused: Do not attempt to write too much information that you wish to pass across in your writing.
- Use Simple Language: When speaking or writing, avoid the use of complex and big words as this will confuse your audience.
- Be Engaging: This style of writing should be informal / casual / conversational.
- Include Calls to Action (CTAs): Sometimes, at the end of the video describe what you would like your viewers to do after they have watched the video be it to visit your website, subscribe, or make a purchase.
Upload or Type: Enter Your Script Directly into the Tool
Once your script is ready, it’s time to input it into your AI video creation tool. Here’s how:
- Manual Entry: Most platforms have a text box where you can type or paste your script. Simply copy your text and paste it into the designated area.
- Upload a Text File: Some tools offer the option to upload a text file containing your script. This is convenient if your script is long or if you’ve collaborated with others using document software.
- Segment Your Script: Break your script into sections or scenes. This helps in organizing the content and aligning it with the corresponding visuals in your template.
Example:
- Animaker: Type your script in the respective box for each scene, here called simply scene 1, scene 2, scene 3 and so on.
- Renderforest: Above the text area there are two options: to upload the script from your computer – use a button “Upload Script” and paste a file with the text or to type the text in manually.
Step 5: Customize Your Video
1. Add Text and Voiceover:
A script defines the flow and content of the script of your video. Texting and voice over plays adds to the way you make your message in that they are entertaining.

- Add Text: Your script text should go into the relevant text boxes in each script of your selected template. Make sure that the text is easily legible and does not create a messy appearance when placed in the viewer’s field of vision.
- Font and Color: Access the color of the font type and size according to the identity of the company or the context of the video.
- Timing: Synchronize it in a way that the text will appear at the correct time when complimenting images appear on the screen.
- Voiceover Options: Most AI video tools give an option for the AI to do the voice over to save time and make the video professional.
- AI-Generated Voiceover: To do this, utilize the AI built-in voice that is included once you turn your script into the application. Select from various voice options and speaking intonations to evoke the best outcome for your text.
- Record Your Own Voice: If you want it a bit more professional, you can even record your own voice. This adds realism and it can also make the amateur video more representative.
Example: As for the script, in the tool like Animaker, you simply write the text for scenes directly on the text fields for scenes. Next type in the text that is to be narrated and either select an AI generated voiceover or record a voiceover yourself.
2. Upload Relevant Images and Video Clips to Enhance Your Content
Enhanced content materials are comprehensive in aspects of interest since they incorporate items such as images and video clips.

- Upload Media: Conduct the action that enables you to upload images and video clips from your computer, as well as utilize the tool’s gallery.
- Relevance: The media selected should complement the script and not be contradictory to it. The images utilized must be of the best quality, and these must relate with the general message being passed.
- Placement: Try to place the media elements in such a way within the scenes that will create the needed impact on the viewer and will result in his/her fixation on the main ideas.
- Editing: Crop and alter sizes of media factors used within the clips to make it blend properly in the wanted video.
- Consistency: For a proper flow, make sure that the aesthetic of the video is consistent throughout the entire process.
Example: In Veed.io, you can drag and drop images and video clips onto the timeline. Use the editing tools to adjust the size and position, ensuring they align perfectly with your narrative.
3. Use Animations: Apply Animations to Text and Images to Make Your Video More Dynamic
Animations create dynamics and excitement in your video; hence, people would be more interested in watching your video.
Animate Text: Use text animations to make your script pop.
- Entrance and Exit Effects: For text the animations should clearly enter and exit the screen in a smooth manner.
- Emphasis: Use colorful blinking or zoom to focus the attention to the necessary words or phrases.
Animate Images and Videos: Animate pictures and short videos in order to improve their effect.
- Transitions: A few transition rules between the scenes and media elements should be smooth for the fluent story.
- Motion Effects: An example of motion effects is when an image or a clip is made to move by adding effects such as zooming to make it more interesting.
Example: It is important to note that in Renderforest you are able to add basic text animations such as fade-in or slide-in for more life to the text. This should also be applied on images and videos to give an illusion of zooming or panning.
Step 6: Add Music and Sound Effects

Music and sound effects can make your video more engaging and enjoyable.
Choose Background Music
- Select from Library: Use the tool's library to find royalty-free music.
- Upload Your Own: You can also upload your own music if you have any.
Add Sound Effects
- Incorporate Sound Effects: Use sound effects to highlight important points or actions in your video.
Step 7: Review and Edit

After assembling your video, it's important to review it to ensure everything looks and sounds great.
Preview
- Watch a Preview: Play your video to check for any mistakes or awkward transitions.
Make Edits
- Adjust Timing: Ensure that the timing of your clips and audio is perfect.
- Edit Transitions: Smooth out any transitions between scenes.
- Fix Animations: Adjust any animations to make them look seamless.
Step 8: Export and Share

Lastly, once your video is edited, the process of sharing your video can begin through exporting of the video.
Export Settings
Choose Resolution and Format: Choose the right resolution of the video and the format, for instance MP4).
Share
- Upload to Social Media: Upload your video on social media such as Facebook, Instagram and twitter.
- Post on Your Website: You should make sure that you put a link of the model on your website so that anytime you require it you can easily access it.
- Use Video-Sharing Platforms: Share on YouTube, Vimeo or any other video sharing website to reach the largest amount of people.
Conclusion
Using AI in the creation of animated videos is easy and user-friendly and the outcome can be a very professional video in little time.
Through these procedures, you should be able to bring out your ideas in a more creative form of animation that will catch your viewers’ attention.